Thursday, September 11, 2014

Phun with Phillo

Lately I've been craving lumpia, a Filipino dish that my mom used to make for me. If memory serves me correctly, it was full of pork and ginger and yummy goodness, etc. It was also FRIED. In a big vat of oil!!! *gasp*
I've been trying to avoid fried foods lately, so in thinking of alternatives, I thought of baked phyllo dough. I set off on an experiment and I learned a few thing that I'd love to share with you! I'll just say off the bat, I loved the flavor of my lumpia. I loved the texture of the phyllo dough around the filling. My only regret is using the filling raw. Sure, it cooked just fine in the oven, but it released so much steam that it made the bottom of the rolls soggy. The flavor was great, but the texture left something to be desired. In the future, when I make this recipe, I'll cook the filling first and then make the lumpia once it's been drained and cooled!
*Note. The phyllo dough is found in the freezer section. I just stick it in the fridge for a day or so until I'm ready to use it.
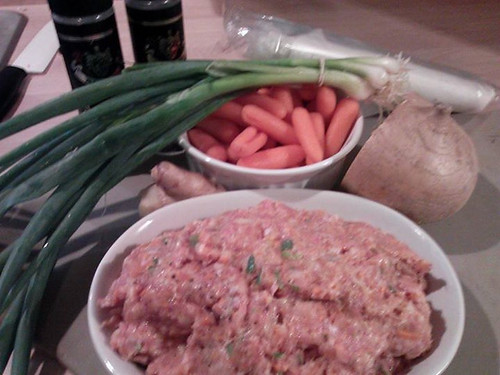
I made the filling from ground pork, ground ginger, garlic, onion powder plus carrots/green onions/jicama that I minced in my chopper.. Add salt, pepper, and soy sauce to taste. I'm sorry. I don't measure stuff, but it's really not that important! I used a pound of ground pork, a bushel of green onions, a few cloves of garlic, a BUNCH of ground ginger (because I love ginger!!), etc. If YOU love it, add more. If you don't love it, add less or omit it altogether. I swear, it won't make or break the recipe. It's about being tasty to YOUR palate!
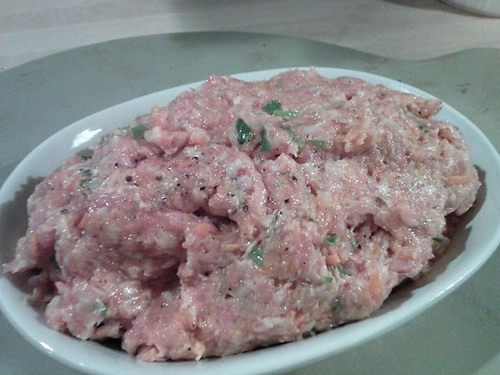
My mixture looked like this, but in hindsight, I'd throw all this in a pan and cook it up, drain it, cool it, then use the cooled mixture. But, live and learn!
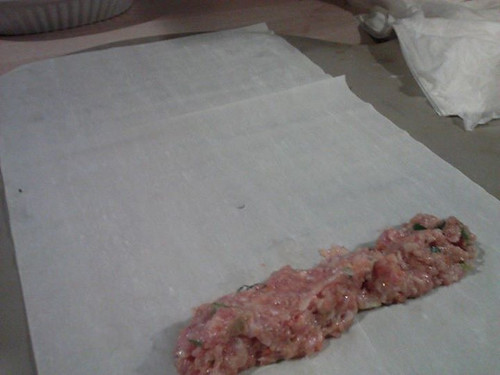
Lay a stip of the filling at the end of a sheet of phyllo dough.
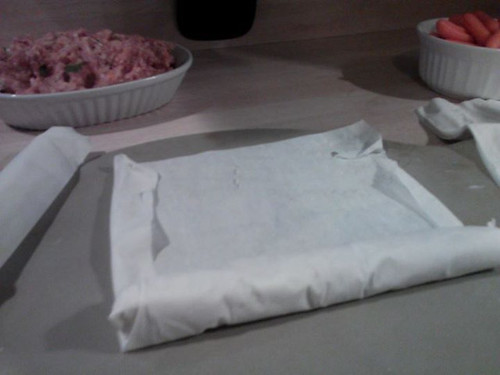
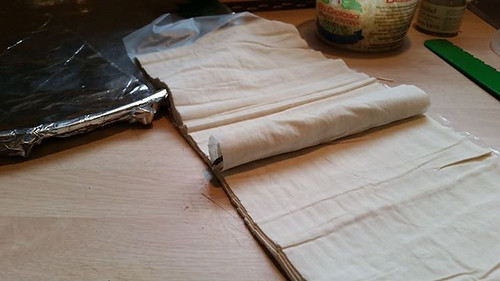
Roll it up, about half way so you can tuck the sides...
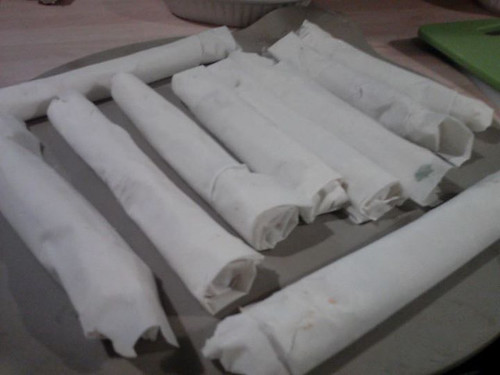
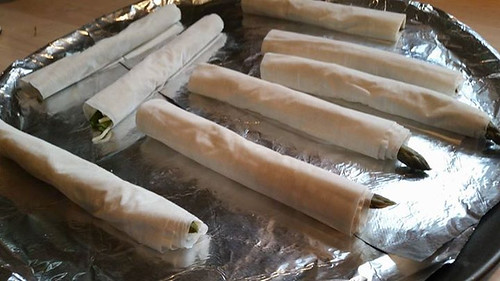
This is what the end rolls should look like, abouts.
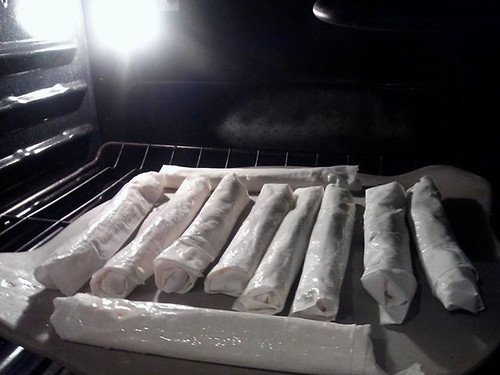
Brush with melted butter and bake at 400 for 10 to 15 minutes.
*another thing I discovered... They actually crip up better on a tin lined cookie sheet than a pizza stone! Go figure!
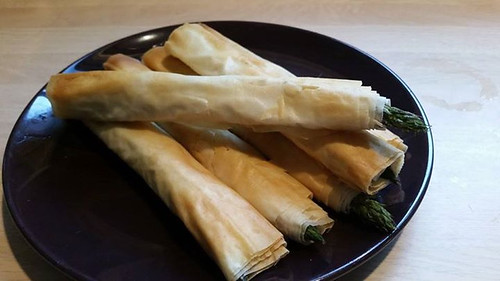
So, after my lumpia experiment I got vey excited for variations of phyllo stuffed "things". I branched out to asparagus first. So funny... One of my boys won't eat asparagus.... But if I roll it up into some cripsy dough he's all over it! Yay!
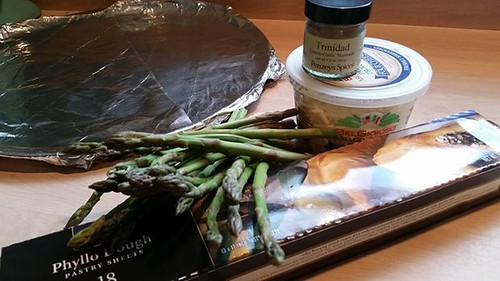
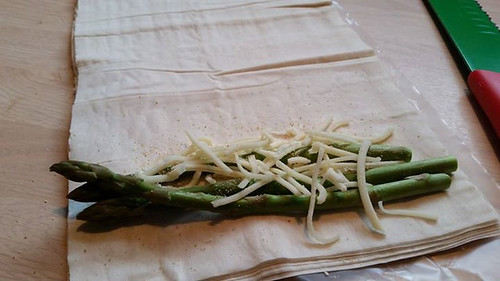
I used: asparagus, phyllo dough, melted butter, parm cheese, Penzy Trinidad seasoning ( lemon and garlic)
I used about three pieces of asparagus per roll because it was pretty thin. Otherwise, I'd probably use two.
The Penzy Trinidad seasoning was yum! But you could also use just salt and pepper/ olive oil, or lemon juice and parm cheese, or whatever your palate prefers.
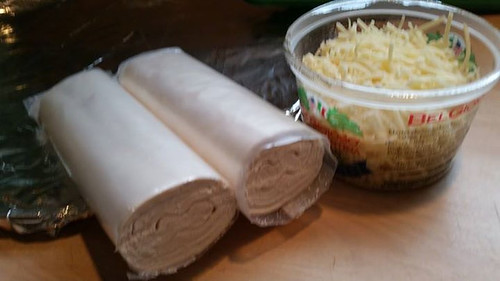
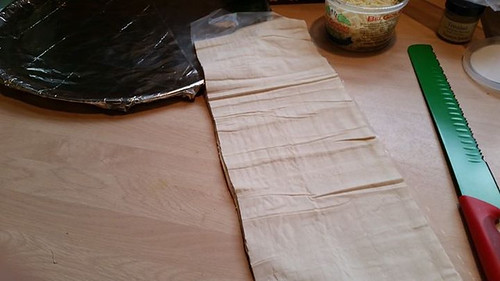
I cut the roll of dough in half because it was just way too long!
I put half back in the fridge for desert, which I'll get to in a second!
Then I just brushed them with melted butter, put them on a foil lined sheet and baked at 400 for 20 minutes. I checked them after 15 but I thought they need just a bit more time.
Nom!!! Everyone gobbled them up!!
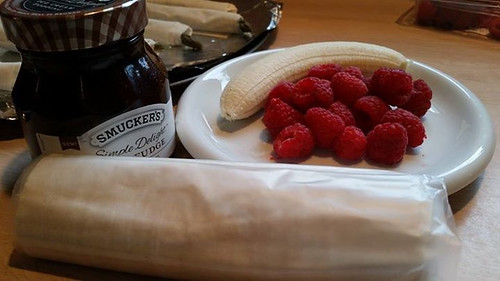
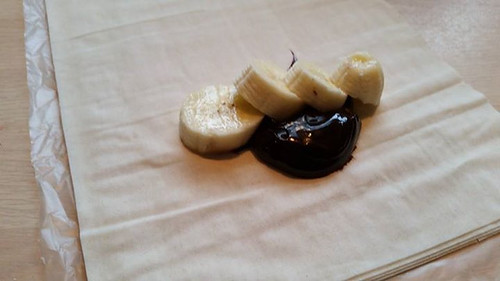
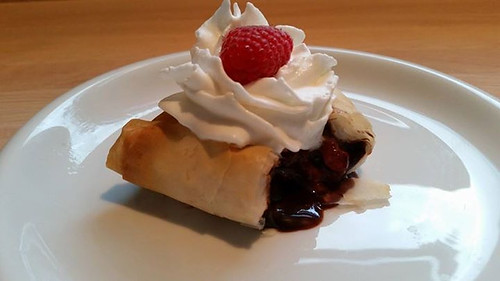
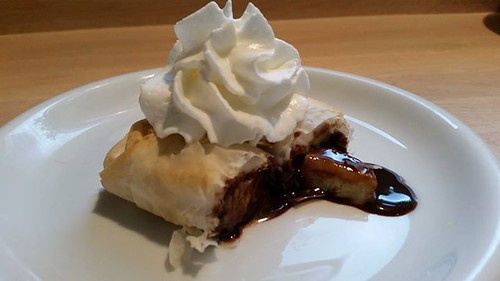
Variations!! I had plenty of left over dough, so I decided to make desert too. I made banana & fudge and raspberry & fudge roll-ups. Tomorrow I will make peanut butter and fudge roll ups. Seriously, you can put anything you like into it... Nutella?! Yes, please. Caramel and pistachios? Duh! Marshmallows and fudge with graham cracker crumbs?! Zomg.
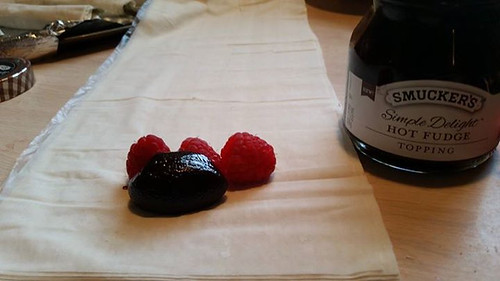
A dollop of fudge, a few raspberries... Roll and fold!
Banannas?! I got some of those...
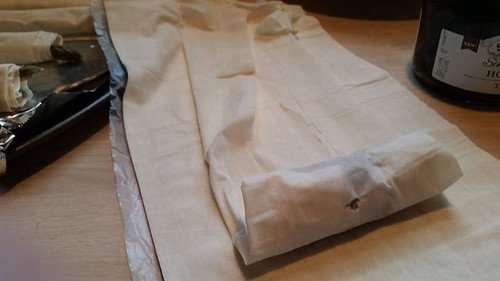
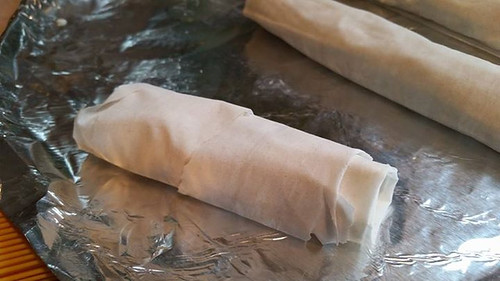
Rolled up nice and tight and ready to bake! Just brush with butter and do the 400 degrees for 20 minutes. Let them cool a bit before you top with cream and serve!
So, I've been having fun playing with phyllo! I hope to comtinue my trials... Maybe salmon and dill? Cream cheese and shrimp? Canned peaches and cinnamon? BACON AND CHEDDAR?!?!
Sky is the limit! Enjoy!

Wednesday, March 27, 2013

Traditional Egg Gravy on Toast

Spring is here! Soon you may find yourself with a basket full of hard-boiled eggs, so I thought it was the perfect time to share one of my favorite all-time comfort foods... Egg gravy.

Sounds kinda Ewww, huh?! It sooo is not! It's simple, easy, and you probably already have everything in your home you need to make it.

I've heard this became a popular dish during the Great Depression because it is inexpensive and can easily be adjusted to feed a large family (Easter morning maybe?!). I grew up with my mom making this for us and it's still one of my favorites! I hope you enjoy!

You will need:

1tbsp butter

1tbsp flour

2 hard boiled eggs, chopped

1/4 tsp dry mustard powder (or a squirt of yellow mustard)

1 c milk (I use 1%... It doesn't really matter)

Salt and pepper, to taste


This is a basic white gravy recipe. Start by melting the butter in a sauce pan and adding the flour. Mix it together and let it cook a bit to form a roux and cook off that starchy flour taste.

Add milk and bring to a simmer. The hotter it gets the thicker you will notice the gravy become; it will thicken even more when it cools. Add salt and pepper to taste, add mustard. Add the chopped egg. The egg should warm through very quickly. Spoon over toast!

Tips:

I prefer Texas toast, but this would be equally good over regular toast, English muffins, or hash browns.

Taste the gravy as you go... It's easy to over salt or put too much mustard in if you don't taste while you cook!

You can add chopped-up bacon, crumbled sausage, dill, or fresh rosemary to the gravy! It wont be the traditional style, but damn tasty!!

Don't have hard boiled eggs? Don't want to take the time to boil any?! That's fine, just use scrambled. It will be nearly as good, maybe better, if that's your thing!


Tuesday, February 5, 2013

Bacon Maple Braised Brussels Sprouts

 
3/4 lb Brussels sprouts, rinsed, outer leaves pulled, quartered
2-3 slices of thick cut bacon, smoked/peppered/anything but maple
2 tbs butter
Salt and pepper
1/4c pure maple syrup (don't bother using fake syrup aka maple-flavored high fructose corn syrup, it will NOT be delicious.. It will be a sugary-gooey overpowering disaster)
Fried onion crisps for garnish. I used Trader Joe's, French's would be fine.
 
Chop bacon into small pieces. Render down in a non-stick sauté pan. Remove bacon bits and set aside. Add butter to the bacon drippings in the pan, add Brussels sprouts. This is the key to the recipe... Don't stir this too much! Give it a quick toss to coat and then leave it to braise on med-high. Give it a little shake and a toss every five minutes. You want parts of the sprouts and the leaves to get a nice sear on them. It adds to the flavor.
After 20-25 minutes check for tenderness. If the sprouts are near fork-tender go ahead and add the bacon back in, turn the burner to med-low. Add syrup. Let it bubble and simmer for at least 5 more minutes. Salt and pepper to taste.
Serve when ready and lightly sprinkle with fried onions as garnish.
Enjoy!


Wednesday, October 3, 2012

Scalloped Potatoes

I love scalloped potatoes! They are very versitile. "Scalloped" basically means thinly sliced and baked in a casserole dish with a milk sauce. Below I will share my favorite preperation method and at the end of the post I will give a few tips on how to mix it up and make it different.

  • 2 - 3 large Russet potatoes
  • 3tbs butter
  • 3 tbs flour
  • 2c milk
  • Nutmeg, salt, pepper
  • Oven at 375 for 1 hour
I use a mandolin to thinly slice my potatoes. I let them soak in a bowl of water while I prepare the sauce. This helps keep them from getting dried out and funky-looking, as well as remove the leaking starches from being sliced.

The first step is to make the roux. A roux is the base to all sauces and gravies. It traditionally consists of equal parts fat and starch... In this instance I use butter and flour. So go ahead and melt your butter in a sauce pan over medium high heat....


Then add the flour....


Give it a good whisking to mix it up .... And here is the important part..... You need to COOK the flour. Whisk it up while it cooks and bubbles for about 45-60 seconds. Cooking the flour for a bit in the butter is going to keep your sauce/gravy/etc from tasting like paste.


Great! Now go ahead and add the milk a bit at a time, while whisking. As soon as you add a liquid to your roux you will notice it tighten up and latch on to that liquid. Keep adding and whisking until all the roux is incorporated.


Here I used 1% milk because that's what I always have in the house. You can use whatever you have and it's not going to make much of a difference, in my opinion.


This is where I add the salt and pepper to taste... I think potatoes need a decent amount of salt to balance the flavor, so I probably added about 1.5 tsp each... It's really just a preference thing. Remember, you can always add more, but you can't take it back!!


As for the nutmeg, I use a whole nut and grate however much I want into the sauce, so I never measure this. Of course you can used jarred and already grated nutmeg... Start with a tsp and see how it tastes... Add more if you want more!


Mix it up, bring to a simmer, turn it off and set it aside.


Drain your sliced potatoes and pat dry. Toss them in a casserole dish.


On goes the sauce. Mmmmm. No need to toss it, just pour it right on in there... It will bubble and simmer and good to happy goodness while in the oven.

Cover with a lid or foil and bake at 375 for 60 minutes.


I like to sprinkle the top of mine with a bit of parmesan cheese when it comes out of the oven, but it's not really a requirement.


Give it a bit to cool before you dip into it. It's layer upon layer of delicious and hot creamy goodness!!


Tips to mix this recipe up:

  • Omit the nutmeg and add 1/4 (or more!!) of Frank's hot sauce.
  • Omit the nutmeg and instead add a cup of grated cheddar cheese to the sauce. Au Graten potatoes!
  • Omit the nutmeg (see a trend here?!) and add a dry packet of ranch dressing mix instead.
  • Omit nutmeg and replace with another fresh savory herb of your choice... thyme would be nom nom.

ENJOY!


Thursday, August 23, 2012

Chocolate Raspberry Pavlova

About a year ago a friend of mine from New Zealand posted a picture of a dessert she made... Pavlova. I had actually never even heard of it, but turns out it's rather popular in New Zealand and Australia. It looked delicious but I just now got around to trying to make one. My first attempt didn't go so well, but I was pretty sure I knew what I did wrong. My second attempt was an absolute success!!

Ingredients:

  • 4 egg whites
  • 3 tbs unsweetened coco powder
  • 2 tsp corn starch
  • 1 - 1 1/4c sugar
  • 1 tbs red wine vinegar

Topping:

  • Whipped cream (1c cream, 1 tbs vanilla, 2 tbs sugar)
  • Berries of your choice (obviously I picked raspberries)

Preheat oven to 300. Mix coco powder and sugar together. In a very clean bowl whip egg whites until soft whip cream-like peaks form. Gradually add sugar and coco mixture, about 1/4c or less at time, just until incorporated. Add corn starch and vinegar to batter and fold or gently whip to incorporate.


Line a baking sheet with some parchment paper and plop the batter down in the center. Using a spatula, smooth the mixture into a round disk aprox 9 inches around, 2 inches tall. This is not an exact science so just make it roundish and even.

Pop into the preheated oven for 60 minutes. After 60 minutes turn off the oven and crack the door open. Let the pavlova cool naturally. The meringue part of this dessert is best served room temp or cold.

When you are ready to serve just whip up some cream with sugar and vanilla, slap it on top of the pavlova and top it with delicious fresh fruit. I found a bit of chocolate I had in the house, pretty sure it was a Hershey's miniature, and grated that over the top. Slice with a sharp knife and serve.

Tips and ideas:

  • This is practically a no fail dessert, yet I managed to mess it up the first time. I had never made a meringue before and I was pretty sure my mistake was over-beating the egg whites, of which I initially used 6 instead of 4. I had used an electric hand mixer and went to town on those egg-whites!!! What I ended up with was a meringue that was too thick, too tall, had a super sturdy outer shell:


Not the light and airy dessert I was going for. More like a kindergarden paper mâché project! This time I used a good ol' whisk, and that was probably a much better idea.

  • I wasn't sure what my meringue should look like at the point I should add sugar. Whenever I need a bit of visual help I usually turn to YouTube! I found a helpful little video demonstrating how to make a pavlova. That's always a huge help!
  • Traditional pavlova isn't chocolate!!! *gasp* Insane, I know. So if you would like to make a traditional pavlova just leave out the coco powder, add a tbs or two of vanilla to the egg whites (after they've peaked), and use malt vinegar instead of red wine vinegar. Traditional topping is usually sliced kiwi and strawberries.
  • This would be the perfect dessert to make the night before a party. Bake it and just leave it in the oven to cool overnight. No need to refrigerate it. When it's time to head out to your party, or have people over, just whip up the cream, top with berries, and wow everyone!
  • This is a very light and airy desert. It's sweet, but just barely. In fact, I'm not a huge fan of sweets. Although I love to bake, I usually give away my scrumptious concoctions rather than eat them myself.....But THIS I could eat all day. In fact, I had a slice with my coffee this morning. Omm nom nom.


Tuesday, December 13, 2011

Mushroom Pie!


This is a fungus-lover's ultimate meal. Just a few ingredients and it tastes FANTASTIC!
For this recipe you will need:

10z package of Baby Bella mushrooms, diced fine
Medium onion, diced fine
2 TBSP chopped fresh dill
Salt and pepper to taste
1 c shredded Swiss cheese
1/2 c half & half
3 shots of cooking sherry
1 tbsp butter
One package of puff pastry, thawed
1 egg white

Preheat oven to 350

Heat butter in a skillet and saute onions until they start to turn clear, add diced mushrooms and dill... cook over med/high heat for another 3 minutes.


Add sherry and half & half, turn heat to medium and simmer for about 5 minutes. Remove from heat and stir in cheese.

Prepare the dough by placing one of the two sheets in a 6x6 (or 8x8) baking pan. Alternatively you can lay one sheet on a lightly oiled, foil-lined baking sheet.

Spoon filling into the dish or onto the flat sheet of pastry dough. Place the remaining sheet on top and pinch around the edges to seal the pie. Vent the top of the pie to allow steam to escape. I used a small star-shaped cookie cutter.

Beat 1 egg white and use to to liberally baste the top of the pie. This will give the pie a nice finished sheen and fabulous flaky texture.

Bake for 1 hour, and let cool for at least 30 minutes to allow the pie to set up a bit before serving.


Recipe tips:
  • You could probably use a pie crust too, but I love the puff pastry!
  • Omitting the sherry would be fine, but I like the flavor it added.
  • Don't omit the dill!! In fact, next time I will probably add more. It really make this dish what it was!
  • The longer you let it cool after cooking the nicer it will set when you go to serve it.
  • This was tasty as a meal/pie, but this would be a KILLER filling for appetizer tartlets as well.
  • A chopped up slice of bacon or two would be a welcome flavor in this dish.
  • A different type of cheese, say cheddar, would probably be good too.

Tuesday, November 1, 2011

Crispy Potato Stacks


If I had to chose one thing to eat for the rest of my life that would be an easy choice: POTATO!
Oh, how I love potatoes. Mashed, fried, boiled, roasted, Frenched, stuffed, baked, or soupified.

So imagine my glee when I came across a delicious looking idea for a new way of roasting potatoes!

This recipe is simple and relatively quick. It's ultra quick if you have a mandoline. If you don't have one of those, then a bit more time and a steady hand can accomplish the same thing. These are fun to eat: dig in with a knife and fork or, like my kids, peel each delicious layer off one at a time!


Crispy Potato Stacks

3 tablespoons olive oil
2-3 cloves garlic, minced
1 lb. Russets potatoes
Salt and pepper
Fresh herbs of your choice

1. Preheat the oven to 350F
2. Wash and dry potatoes (peel if desired, I like the skins on) and thinly slice potatoes with a mandoline or a steady hand, the thinner the better.
3. With potato slices in a big bowl, lightly coat with more evoo (about 2 TBSP) and toss with 2-3 minced garlic cloves and/fresh herbs, kosher salt, pepper to taste.
4. Brush 8 muffin tins with olive oil with a pastry brush (or your finger). Lay a potato slice in the bottom of a muffin tin. Repeat until it stacks up to the top of the muffin tin. Repeat until you run out of potatoes.
5. Bake the potato stacks in the preheated oven for 35-45 minutes or until the potatoes are golden brown and cook through.

Variations: Omit garlic and sprinkle in a packet of dry Ranch Dressing mix
Nom Nom Nom